Featured
How to Get Started with Notify: A Step-by-Step Guide
A step-by-step guide for beginners to setting up and getting started with the NotifyCX Email Client.

Notify is an email API designed for developers to send transactional emails directly from their code without the need for managing infrastructure.
The platform offers a simple integration process, allowing developers to add email functionality with just a few lines of code, along with a user-friendly template editor for creating and managing dynamic email templates, enabling personalization through dynamic variables.
This guide provides a step-by-step explanation on how to set up and integrate Notify into your code, and get started with it.
Step 1: Installing Node.js and NPM
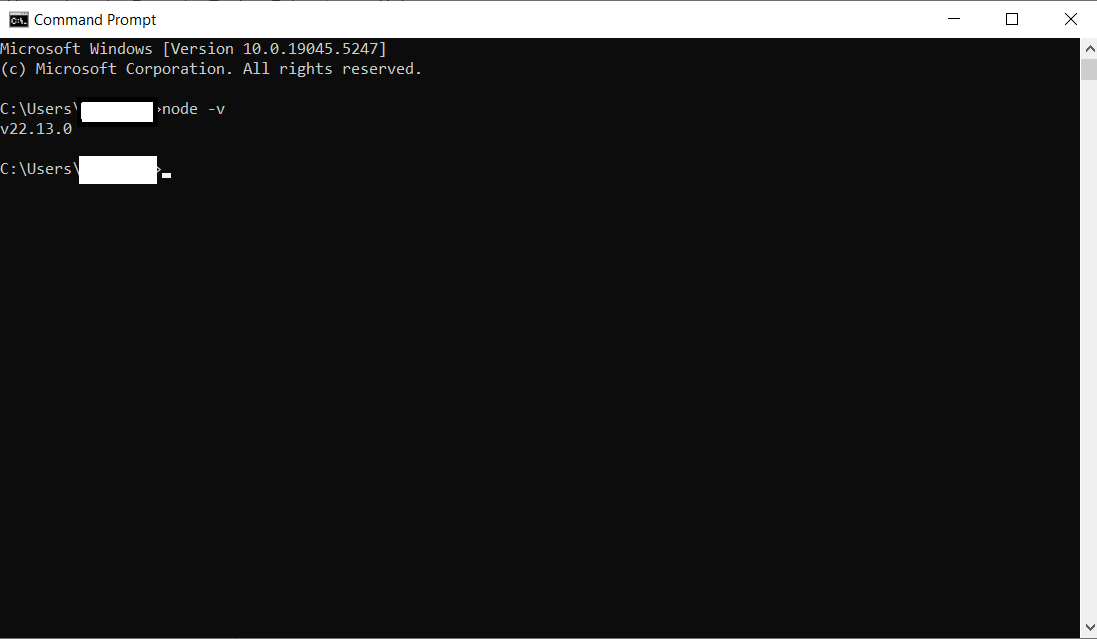
Firstly, we’ll need to install Node.js and NPM.
To install Node.js, go to the official website and download the .msi installer, run it, follow along with the steps to see it through. Once the installation is complete, open the command prompt and run node -v.
If your Node.js installation was successful, you should see the version of Node.js that was installed on your system.
Next, run npm -v to verify that NPM was installed on your system. It should have been included as part of the Node.js installation.

Step 2: Creating a React App through Vite
With that out of the way, we can proceed.
Let’s create a React project through Vite. But firstly, it’s worth noting down that Vite requires Node.js version 18 or higher and NPM version 8. So ensure you’re not using older versions of Node.js or NPM.
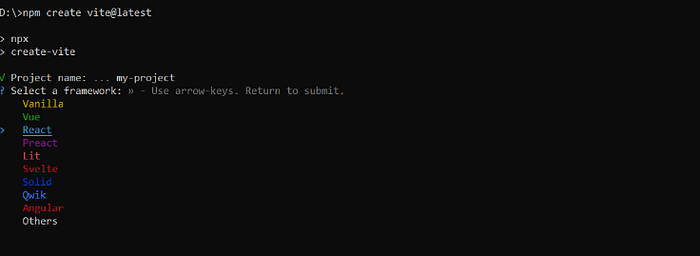
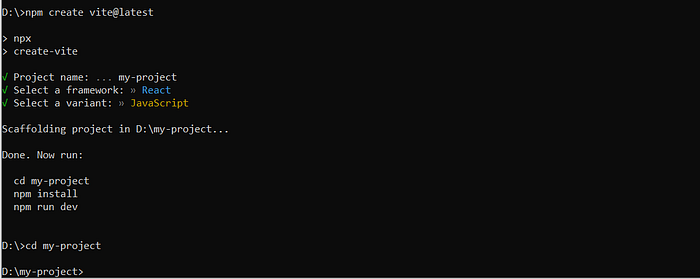
Now, to get started, in your command prompt, navigate to the folder where you want to create your React project and enter the following command:
npm create vite@latest
Enter the project name (this will be the name of your project folder). I’m using ‘my-project’ here.

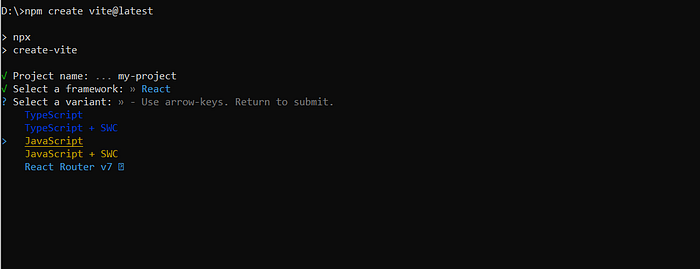
Once that’s done, select the React option (using the down arrow key) from the menu that appears and hit enter.
This will bring up another menu, I’m selecting JavaScript (pick whichever you prefer and hit enter):
Once that’s done, your project will be set up.
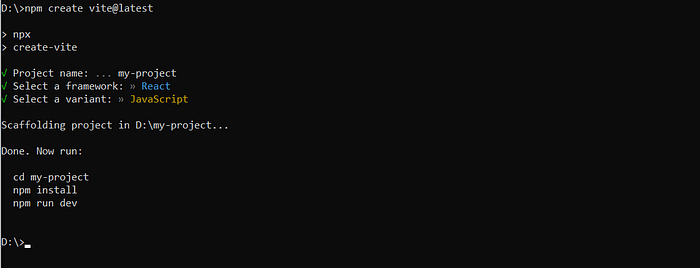
Now, to install dependencies and run the app, enter cd my-project. This will take you to your project’s directory.
Now, enter npm install.
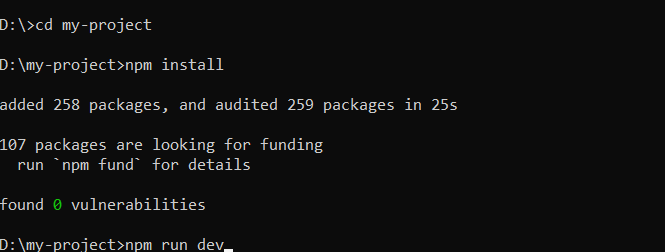
This will install the dependencies. And now you can start your app by entering npm run dev.
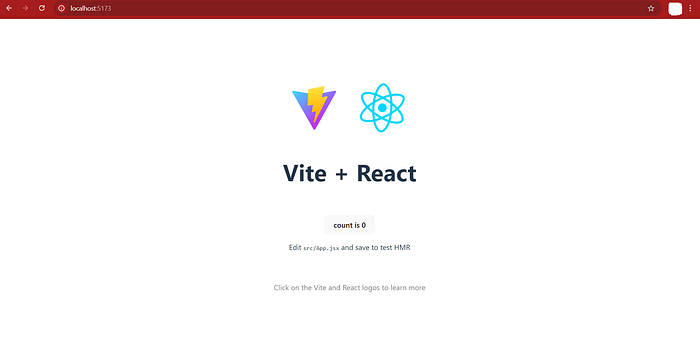
Enter the address of the port in your browser to view it (http://localhost:5173/ for me).
Step 3: Setting up Notify in Your React Project
Sign Up and Credentials
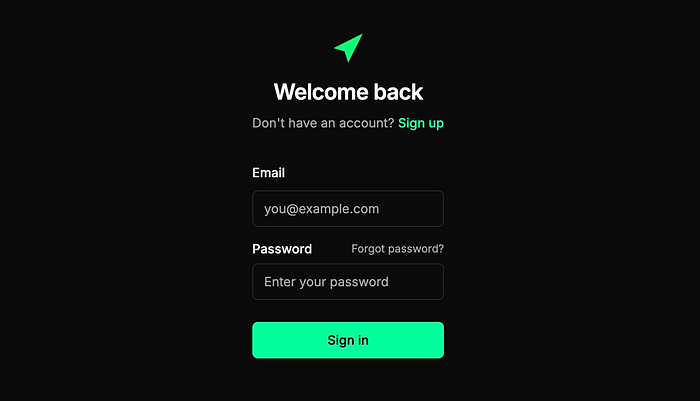
To get started with Notify, first go to the Notify website and click on ‘Dashboard’ on the top right and you’ll be taken to the sign-in page. If you don’t have an account, click on the option to sign up.
Once you’re done, you’ll be taken to your dashboard.

From the dashboard, click on Credentials and note down/copy/save your API key. We’ll be making use of this later.
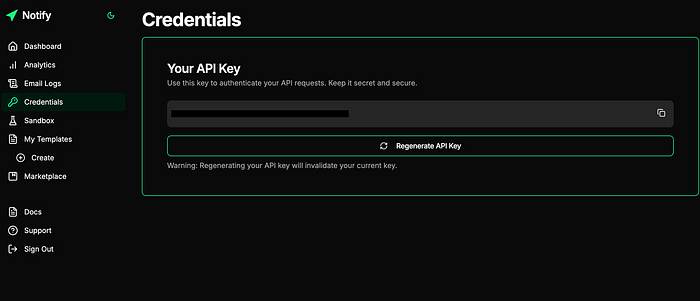
💡 Note: Do not reveal your API key in client-side code or make it publicly accessible.
The Code
Okay, now let’s install the npm package for the NotifyCX Email Client in the React project we created earlier.
To do that, open your command prompt but make sure to right click and select ‘Run as Administrator’. Navigate to the project folder (D:\my-project in this instance) and enter the following command: npm install notifycx
This should successfully install the Notify client for use within your project.
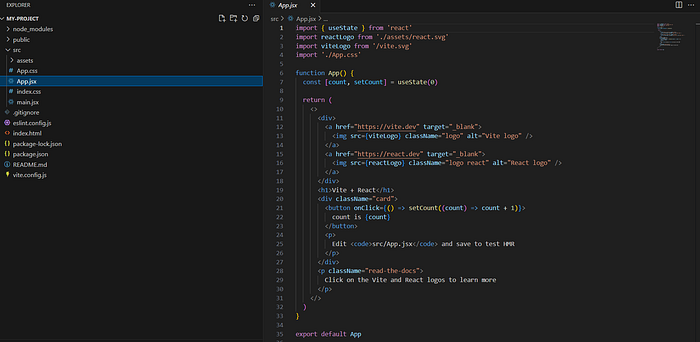
Next, open the project in an IDE (VS code in this instance) and navigate to and open the App.jsx file under src:
Now, we’ll be essentially following the instructions on Notify’s NPM page. Copy this bit of code:
import Notify from "notifycx";
const notify = new Notify("your-api-key");
And paste it here within the App.jsx file:
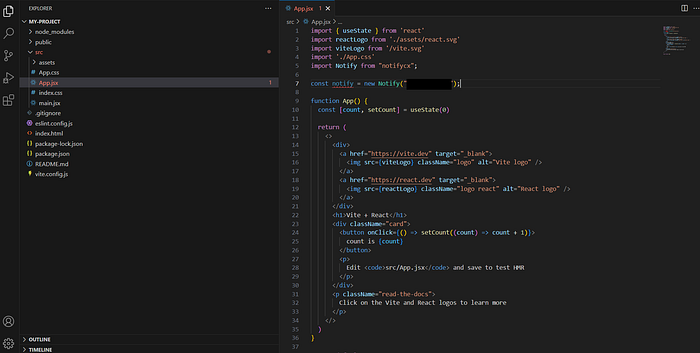
Make sure to replace “your-api-key” with the API key we saved earlier from Notify (in string format, so just paste the API key we noted down within the “”).
This will initialize the Notify client within our project.
Next, to send an email, copy this code:
async function handleSendEmail() {
  await notify.sendEmail({
    "subject": "Hey there!",
    "to": "recipient@example.com",
    "name": "John",
    "message": "Test Email"
  });
}
And paste it here within the App.jsx file:
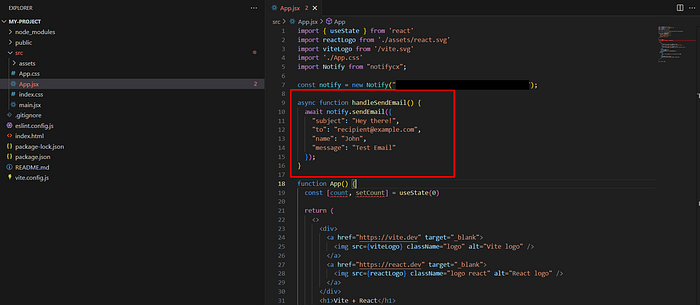
You can obviously change the email address, subject, name and message as per your liking.
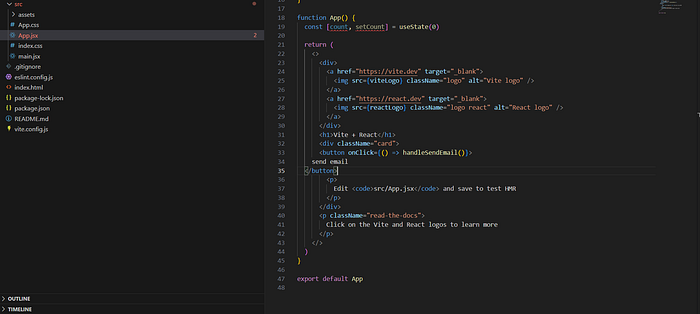
Now, we need to implement one last step. Let’s create a button that will enable us to send an email. For that, we’ll just add a button to our existing React app’s page. Let’s just replace the existing count button with a button for sending emails. To do that, copy the following code:
<button onClick={() => handleSendEmail()}> send email </button>
And replace the existing button in the App.jsx file with it (this is what it looks like):
Running the App
Now we’re all set. Let’s open our React app again by going to the command prompt, navigating to the project directory and entering npm run dev (avoid this step if your React app is already running). Our app should look like this now:
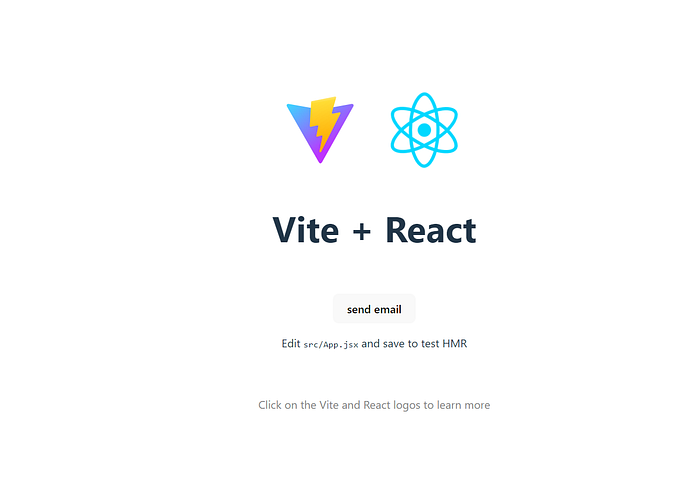
Click on the ‘send email’ button.
If all goes well, when you revisit your Notify dashboard, you should see that the email count has increased.
You can also see details about the sent email under ‘Email Logs’ (on the left-hand side menu).
And that’s it. This article covered the basics of how to integrate and get started with Notify, but there’s a lot more you can do with it, for example, create beautiful templates using their intuitive drag and drop template creator and send emails from your code using these templates.
To learn more about this, check out Notify’s website and their docs.
Hope you found this article useful.